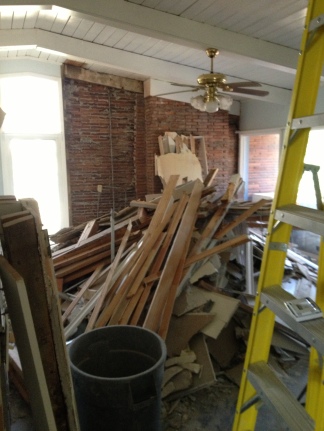
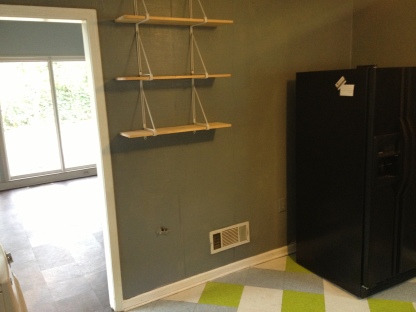
You know how a few weeks ago I told you about the things we hoped we could do to modify our little ol’ ranch style house. Well, I figured I would start with one of the many things we gained from closing up the original front door.
But brace yourselves, because when I tell you that we got around 23,000 pounds of drywall and material out of our little ranch, I know some of you are not going to believe me. In my opinion 23,000 pounds is a lot for this little tight space. Keep in mind that figure does not include the material we took in, just out.
From the outside you wouldn’t know, but this basically means that we had to modify a lot of the original floor plan from 1953. The house still preserves 3 bedrooms and 1 bathroom as the original square footage called for.
As soon as the house was ours we practically took a sledgehammer to it ~ listen to me trying to rack up the points~ it was really Ryan that did it all. I wasn’t even in the country. So no… I never picked up one sledge anything. That was probably for the best! 😉
Before I show you what we did here is a short video of the original kitchen:
One of the first walls we removed was between the dining room and the kitchen. When we took this wall down we created a more open feel to the space. This allowed us to make the kitchen also a dining space with a decent size table for all of us. Previously, the living and kitchen area were separated by a wall. Wall is shown below:
One thing Ryan can testify about is I don’t do modern. I like clean streamlined living but I love walls that define rooms, not big open spaces. With such little space we did not have the luxury of keeping too many separate spaces. So seeing this wall go was sad in a way. We knew the entry from the kitchen would become the only front entry from the carport. There were two front entries when we first bought the house.
Shown below: The fridge pictured was backed up to the wall that separated the kitchen from the living space. You can see an open door that lead to the old “main” main entrance. That opening is now the pantry. And the door you see closed, also above left hand picture, is the utilities closet, which is still there.
Shown below: The pantry was behind the front door with a nook to the right that held the washer and dryer. I will show you later where they are now.
Once everything came out! Shown below:

Our kitchen now:

You can see where the fridge once stood is now a sort of kitchen “island.” It has ample storage space and is great for entertaining. Most everything is from Ikea. We added a new hood vent and changed the counters to butcher block (the link I provided is not the exact one we purchased 4 years ago, the thickness is different but we have solid oak too). We changed all the cabinets and hardware, we added a dishwasher. The only thing we reused in the kitchen were the appliances and the sink. We love the sink! And we know it came from Ikea as well. The faucet is new (we did not utilize the soap lotion dispenser), we had an Ikea faucet for over 3 years and that did not work out so well. We think it had to do with the water pressure into the house and the water quality (all that is for another post ;-).

The wall where the pantry and laundry was is now just extra space. We currently utilize it for the kids digital piano. For large get togethers we move the piano and set a folding table there for extra serving space. Shown below:

Here is a basic floor plan:

What we hope will be next for our kitchen:
The table is new to us and we plan to re-finish it. I love these colors but I am still undecided. Either this darker gray Driftwood by General Finishes or this Phillipsburgh Blue by Benjamin Moore.
We have no upper cabinets. We want to wait since we have several ideas brewing, but can’t quite agree on one. I love exposed shelves. I also think exposed shelves would keep me accountable to what I stash, but I also want something to put the microwave in. We’ll see.
We would also like to add a backsplash. Something with patterned-tile, something chic yet neutral. I think it would make a big impact on the small space.
As grateful as we are that we did not have to spend money on appliances, and the ones that came with the house have been great for the last almost 4 years, the all black is too much for me. One day when they go kaput, we want to change the appliances to these pretty airy little ones. I love the color and style. Don’t they scream the era these homes were built in? They would be such a fun addition!

I know… could I have picked some of the most expensive ones on the market?! We all have a pipe dream or two right?!
Sometimes I regret having done so many modifications. Only because I feel like we have snatched up and buried what once was. I get sentimental like that about certain things, its history!
But, don’t misunderstand me. I don’t want to paint a false picture of our intentions and of owning an old home. We’ve ran into a lot of typical home owning issues that have never been addressed or just patched up, like re-wiring the entire house because the electrical wiring was still from 1953.
Any pressing issues that come up, we have tried to address to prevent bigger problems. Because of all this, we have been provoked to take extreme measures. And by measures I mean just bite the bullet and expand or rebuild. But it’s a big investment and it requires some serious planning and forethought.
While we know there is a lot we would gain from expanding, we want to make sure we measure it against what we know we could potentially lose.
So far, I do have peace that the things we have done up to this point have been the most effective and sensible solutions for our family, and a way to show the house the tender loving care it was so desperately needing and deserved.
♥ Best wishes updating your little ol’ treasure! ♥
Helen and Ryan


Hey Helen and Ryan, we did some similar renos at our home, 3631 Raymond Dr in Northwoods. Your kitchen looks great! Where are you in the neighborhood? Gina and Liang Rivers
LikeLiked by 1 person
Hey! We are super close, on McClave. That is so great to know, I hope to feature some of the other homes that are being given some tlc in the neighborhood. Like yours! My desire is to spur some of the other homeowners to consider renovating their little places. And help them with ideas 😉
LikeLike
Helen! It’s beautiful! It’s such a good start. I can’t imagine that the original owners wouldn’t love the structural changes you’ve made. Before they even moved in, Stephen and Rachel tore down the wall between the narrow little (claustrophobic) kitchen and the dining room in their 1920 row house, and it is SO much better!
LikeLiked by 1 person
Yes, we’ve gotten to see it in person and it looks wonderful! They have a few things going on in their place we have added to our wish list 😉
LikeLike
I have loved your kitchen since I first stepped foot in it. Such a calm and hospitable space. Funny how I never noticed the black appliances or lack of upper cabinets!
Sent to you profess my love for mid century modern kitchens, I’ll leave you with my retro friends latest blog entry: https://baltimorebombshell.wordpress.com/2017/02/26/mcm-kitchen-love/
I met Jaye through Jonathan In Augusta, then she went with us to Egypt, and now she’s known in Baltimore for all things vintage…
LikeLiked by 1 person
Thanks Crystal, I appreciate the sweet comment. I will def. look up Jaye!
LikeLike
*Darn autocorrect! What I meant to say was “Since you profess a love for mid century modern…”
LikeLiked by 1 person
No worries, caught it 😉
LikeLike